Getting started
Welcome to Nageru! For simple use, you can jump right in and make yourself comfortable (at least if you have the hardware requirements in place and have compiled it), but if you prefer a gentler introduction, this is the place.
Introduction to the M/E workflow
Nageru, like most hardware video mixers, is based on the mixer/effects workflow, or just M/E for short. (Don’t ask why “mixer” or “effects”; the name is confusing and mostly historical.)
The basic idea of M/E is that you have two main displays, preview and live. Every time you want to change what’s shown to the viewer, you first bring it up on the preview display, verify that it indeed contains something you’d like to show to your viewers, and only then start a transition to move the preview display onto the live display (which mirrors exactly what the viewers see). After the transition is done, the preview and live displays switch, allowing the operator to either switch back or to pull a new source onto the preview display.
In Nageru, the available transitions at any time are governed by the theme. However, generally a simple cut (moving immediately from live to preview) will nearly always be an option. Other effects include fades and zooms, but availability will depend on what sources are involved in the transition.
A brief tour of the Nageru UI
The basic Nageru UI with the default theme looks like this:
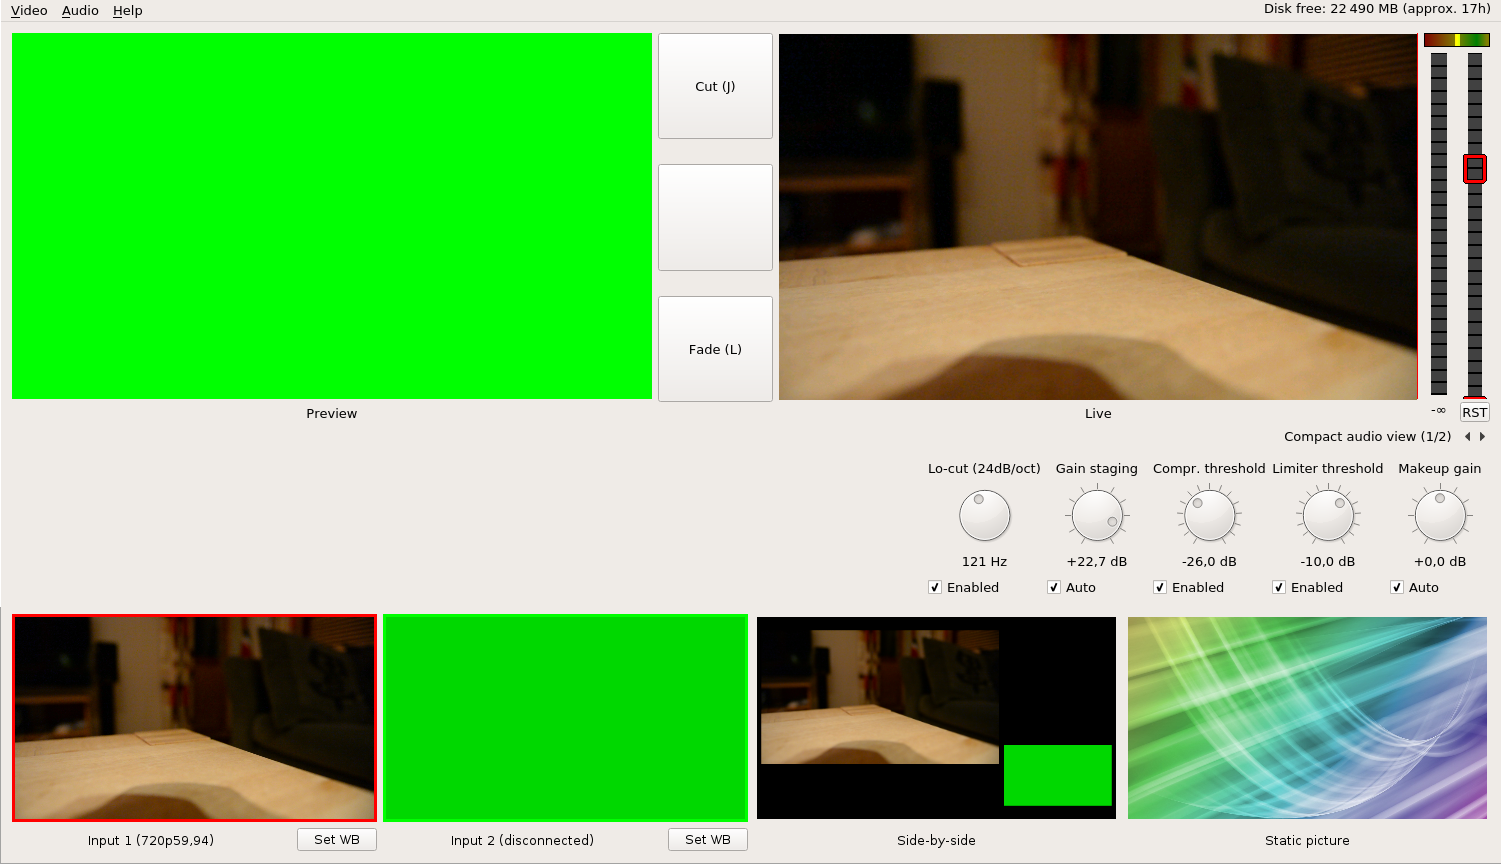
First a word about user input: Nageru can be controlled by the mouse or keyboard, but most operators will prefer using both hands on the keyboard. Like on a real mixing console, you use your left hand to select sources for preview (using the 1–9 keys) and the right hand to choose a transition (using J, K or L). In addition, audio can be controlled using a MIDI controller if you want to; see the audio page for more information.
In some situations, like if you’re producing sports, it can be useful to skip the preview step and cut directly to a source. Nageru supports this through quick-cut keys; if enabled, Q, W, E, etc. will have the same effect as pressing 1, 2, 3, etc. and then quickly J (for cut). Since it is easy to press such a key by mistake, this behavior is off by default, and must be enabled explicitly from the Video menu or through the “–quick-cut-keys” option.
Channels
The preview and live displays are the most important part of the UI, and thus take up the bulk of the space. In addition, we have the list of channels and scenes (the side-by-side view and the static image) along the bottom. As you can see, we have only one (rather boring) input connected, and it is live. The other input is disconnected and thus shows only a test color. These correspond to pressing the 1 and 2 keys on the keyboard to activate preview, respectively—or you can left-click on them do achieve the same effect. (Right-clicking will bring up the video card context menu; see below.)
Similarly, we have a side-by-side view; it is composed of a big image of input 1 and a smaller one of input 2. (If you are unhappy which is which, you can switch the two inputs; again, see below.)
Finally, we have a static image. The one included with Nageru is rather bland and generic, but it works as a generic pause image when you don’t really want anything on the screen.
For any given channel, you can see that it is active in the live or preview by looking at its border. If it’s got a red border, as in the leftmost input, it’s live (either on its own, or as part of the side-by-side view). Similarly, if it’s got a green border, as in the second input (you can see it if you look closely; it’s a somewhat lighter shade of green), it is the preview. On conflict, red (live) wins, since it is the most important piece of information.
If you have many channels, the default single-row view can make for previews that are somewhat small. If so, you can switch to the video grid display; see The audio views for more information.
Transitions
Whenever you have a different channel pulled up on the preview from on the live display, you will see that the three buttons in the middle offer you various transitions. Selecting any of them (either by the displayed hotkey, or using the mouse) will swap the preview and live inputs, effectively making the preview live. If you use “cut”, this will happen nearly instantly; the two other options, zoom (only available with the side-by-side view) and fade (not available with the side-by-side view) take some time, as you can see in the live view.
A good operator knows to use the right transition at the right time, so that the end result does not distract from the actual message of the video. In particular, too frequent switching between sources will probably be perceived as disturbing.
The audio strip
The look of the audio strip will vary significantly with what audio mode you are in; the default is the simple mode, but multichannel is much more powerful. Both modes, as well as the level meters on the right, are explained in detail in the section about audio.
The video card context menu
If you right-click on a channel that corresponds to a video input (ie., not the side-by-side view or static image), a simple context menu pops up:
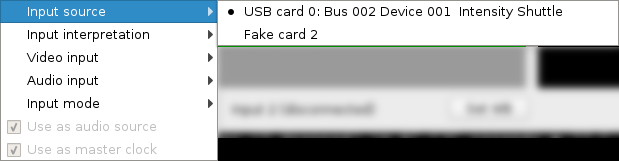
The options presented are as follows:
Input source: Connect this video input to a different physical card, taking effect immediately. The theme supports only two inputs at a time (you can write your own that support many more if you wish), but if you start Nageru with a higher value for the “–num-cards” option (aka -c), you can choose any of the available ones here. This option is also useful if you want to switch the two cards, since input 1 is bigger in side-by-side mode. (See also the “–map-signal” option, aka -m.)
Video input: If a card supports multiple kinds of inputs (e.g. has both HDMI and analog inputs), you can select which one here.
Audio input: Similar, just for audio. “Embedded” means an audio stream that is included in the HDMI or SDI signal.
Input mode: Choose the video input mode to use. Note that the USB cards autodetect the mode, and you cannot override it even if you wanted to. For PCI cards, autodetection is not supported (even for the select few cards that can handle it in hardware), but a simple option (“Scan”) is available to try all modes in turn until a signal is received.
Input interpretation: Choose how the Y’CbCr values in the input signal are to be interpreted. Auto will choose whatever is correct (as per the appropriate standards) for the current video mode, but occasionally, devices will get this wrong, and you will need to change this setting to get correct colors. You can use the –input-ycbcr-interpretation= command-line option to achieve the same effect.
See The frame analyzer for figuring out if you need to change this. If unsure, leave it unchanged.
Use as audio source: See the audio page for more information. For simple audio only; unavailable in multichannel mode.
Use as master clock: The output stream needs exactly one stream as master clock. The frame rate and clocked will be locked exactly to it, so use the most important input here. A signal that keeps getting unplugged and replugged might not be the best candidate, although the PCI cards have fallback internal clocking when the signal is lost (the USB cards fall back to a strange mode of about 30.13 Hz).